Courses
DIT Course Evaluation: Module III
The third part of the DIT course, organized by 709 Media Room in collaboration with Rafa Roche, took place between December 17 and 19, and dealt with color correction.
In this module we could say that several of the 709 Media Room courses come together, although in a more intensive and not so extensive way. On the one hand we have the Color Correction Theory course (to be held at the end of January); the DaVinci Resolve course (for which there will be an upcoming call in February), on the use of this tool; and the advanced DaVinci Resolve course, on advanced techniques and the creation of looks.
The first day consisted of all the general theory of color correction and was given by Luis Ochoa, colorist, postproducer and director of photography with experience in projects in London and Spain, and trainer in postproduction and color correction since 2004.
On this day the main objective is to acquire a technical base, so Luis explains some basic concepts such as the post-production process and where color correction comes into it (which is not always at the same stage), gamma curves, conforming, the use of monitors and measurement tools such as waveforms or vectorscope.
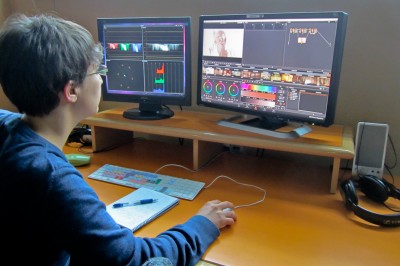
Once these theoretical concepts are clear, it is time to move on to practice, and for this, on the second day the entire interface of DaVinci Resolve (Version 9 Lite) is taught so that we can begin to apply them in practice.
Step by step Luis explains each of the windows of this color correction system, the settings and the tools we can use.
During the third and last day we went deeper into the node system used by DaVinci Resolve. Luis taught us the differences between serial nodes, parallel nodes, layer mixer (among others) and we learned some of their uses.
We performed several examples to better understand its applications, such as the “Bleach Bypass” effect (look used in the movie “Saving Private Ryan”), combinations of masks, layers and alphas, certain variants in the image or an exercise with the HDRx of the Epic NETWORK.
Then we tried out the tracking and animation tools and, before taking a lunch break, we looked at Powergrades, Stills and the Deliver window, where all the render and export settings are decided.
In the afternoon, the class was continued by Yoyi Molina, advertising director, special effects technician, colorist, director of photography and technical advisor with experience in multiple productions since the late 90s.
This class was a little freer, taking into account our doubts and requests on those issues that had not been entirely clear. Therefore, we went back to the nodes, this time performing more advanced practices and in more detail to be able to finish understanding them. They consisted of fixing skins, creating looks, black or white diffusion filter and deleting elements from the image.
Once this was clear, we moved on to some practical tips to avoid certain problems with the machines we have, such as using the Render Cache. Yoyi also told us about the “seesaw theory” to read a parade and know quickly if there is any color contaminating our image, and the “time”, to measure skins in the vectorscope.
In the last part of the class, we had the opportunity to have Rafa Roche and Yoyi Molina together, examining together the practices we did during the camera module.
In short, this part of color correction within the DIT course is very intensive due to the large amount of information received during three days, but totally necessary to consolidate and check some concepts that have been acquired during the rest of the modules.
If you are interested in the next calls of the DIT Course, in this link you have all the detailed information; and here you can see the evaluations of the previous modules, general video theory and camera operations.


