Tutorials
DaVinci Resolve Tutorial: Adding grain
Dec
HOW TO ADD GRAIN TO AN ENTIRE FILM (THE EASY WAY)
One of the things that people are not aware of when using Resolve, is that apart from being a color corrector it has some modest compositing features (DVE, multiscreen, Chroma, Blend Modes….) that can be very useful for creative uses of color correction. Today’s case in point is how to add grain to an entire film after we have finished color grading.
On the internet there are several companies specialized in archival footage with different grain styles, I personally recommend you:
If you look at all his footage with grain stock footage they always show it on top of a medium gray. This is essential for what we are going to do in the following steps; so if you don’t want to buy footage another option is to use After or Nuke or whatever you use to apply a grain simulation on top of a solid medium gray as well.
To do this first in the MEDIA tab select a movie with grain (about 5-10 seconds will be more than enough) and with the right button open the different import options. The one we are interested in is ADD AS A MATTE. This will load the shot in the media pool and we will see that it has a cutout icon on top of it.

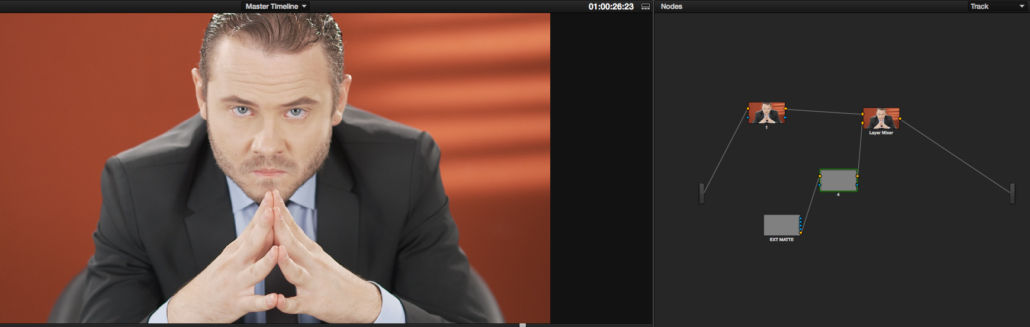
Next we will go to the COLOR tab and within the node system we will choose to enter TRACK mode. After creating a first node we will select it with the right button and we will see that the ADD MATTE option appears and inside we will see as a sub-option the name of the movie we have imported before. This will appear as a node called EXT MATTE (and loop inside it) connected to our first node. We disconnect them and then we add a LAYER MIXER to node 1.

This Layer mixer will be required to have one more input (select, right click and choose ADD INPUT).

To the external Matte we remove the image through the yellow and round connector and we connect it with a SERIAL node (apple+S in Mac) and this in turn we connect it with the LAYER MIXER. For a proper mixing inside the LAYER MIXER with the right button choose COMPOSITE MODE / OVERLAY. If our grain film was composited on medium gray, this process will not change the contrast of the colored film at all.


The serial node that we have previously connected to the LAYER is useful both to control the opacity of the film with grain through its KEY options (remember that GAIN is equivalent to opacity) and to be able to apply it with a LUMA QUALIFIER if we want the grain to be only in high, medium or low lights.
Buff, this tutorial has been complex, yoyi. I know from my own experience, don’t despair if you don’t get it right the first time and go through each of the steps to locate possible errors. I promise that with time it will become intuitive.
The strong advantage of this method, versus compositing grain in the CONFORM timeline, consists in the application of a one-time loop to an entire movie, on the one hand, and in the fact that in this way the grain films will not occupy visual space in the timeline nor will they drive you crazy when you try to jump shot by shot correcting color.
This is one of the exercises we do in the advanced DaVinci course and if you still don’t know the program and want to learn you also have a basic course.
Ala, enjoy yourselves…
P.S. I want you to share your Looks with other users in this wonderful NETWORK that the good Lord has given us….