Tutorials
First impressions with Smoke 2013
Oct
The author:
Hi my name is Yoyi and I work part-time as a Compositor-Editor-Colorist-Realizer and therefore I found it interesting to learn Autodesk Smoke 2013: the tool that they advertise as the Swiss Army Knife that will make it unnecessary to jump between editing-composition-color programs. I intend to make a regular series of posts about my first steps learning this program.
I’m a newbie with it, so you won’t find any cool tutorials or anything like that here: just the frank and maybe uninformed experience of one person trying to get the hang of the program.
To start this series I’m going to give you my impressions about the colorist work in Smoke 2013. As I’ve read that on the internet people get bored with long texts I’m going to do it quickly, I assume that the reader has knowledge of postproduction and I’m not going to explain the technical words – you’ve been warned…
INTRO:

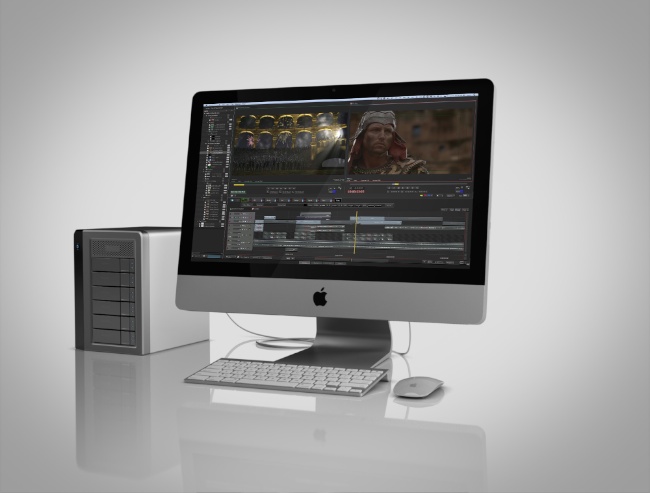
The corrector is divided into two modes CC and CW. The first one is pretty standard and would be the one we would use for a “PRIMARY” correction with the same functions we could find in an Avid: Curves, Newton spheres, contrast, saturation and LUMARANGE (yupieeee) selectors (PHOTO). You can also do color suppression and channel recombination. The CW (color warper) is focused on secondary work and the impression I got is that it does its job very cleanly.

HOW COOL:
Having the compo tools at your disposal makes it very straightforward to create “looks” based on diffusion operations, sharpen and add defects to the image (grain, highlights, blemishes and other deterioration for those looking for a seventies GRINDHOUSE look).
Being able to make adjustment layers (called GAPS) to apply effects to a whole timeline in a second. This is something common in the Avid world and since Cs6 version also in Premiere…
You can easily save color presets (not as fast as in Davinci or Color, but cool) for reuse in other projects.
The three-screen simultaneous viewing mode (FOTO) makes it very convenient to compare different shots within a timeline when matching them.

The offline reconforming tests I have done have worked without exception and I have made it really difficult for them.
You can generate proxies in your own footage capture to speed up processes, always keeping the link with the original. This means that a RED project can choose to use a PRORESS encoded version and use only the RAW for the specific shots that can benefit from the additional information it offers (iso, color matrix, etc…).
The footage viewer is very complete, with the possibility of applying LUTs (1d and 3d) and direct widescreen cropping operations without rendering. This is extremely useful for logarithmic editing projects where the editor will not have to go crazy with color correction filters to get an idea of the quality of the shots he is putting together. As collateral it also correctly represents the contrast and 709 color space on a computer screen (unlike almost all editing programs), the interlaced signal and the pulldown-pullup.
WHAT’S NOT COOL:
I understand that MC Color is basic with this program because the way of moving the numerical values in tiny boxes, the mini Newton spheres and the damned calculator of the program that jumps every time I try to go down or up a value is A DEEPLY BULLSHIT.
Three secondaries for each application of the color warper filter seem to me to be too few although other tools like COLORista 2 only have one. Interestingly the Colorista 2 secondary viewer looks very, very similar.
I find it very silly that there is no mask generator inside the color editor (even if they were only circles and squares). Also, once the mask is made you lose the RT (Premiere can, coff, coff). As collateral the tracker I have tested it and it is quite good but I am very bad used to this being a one button operation in Davinci (which by the way is 3d tracker and not 2d as in Smoke). In my opinion this section is a very strong handicap for this program when it comes to consider it as a serious alternative for color correction works. So I’m still with my Davinci…
I don’t like the fact that you can only see the result of COLOR WARPER or CC separately, since choosing one necessarily eliminates the other and the truth is that it would seem much more logical to me that they would be added together, so that if with the second one you have made a secondary one then you could use the recombination of channels of the first one.
The CC animation curves are cumbersome, give me something less powerful but faster if a client in the room asks me to do a “dynamic” (the Avid Ds also suffered from this, to be honest).
CONCLUSION
Smoke has as its main virtue the fact of being a tool for everything: editing, compositing, graphics… but I begin to suspect that this is a drag on the interface making it somewhat cumbersome in apparently easy operations (e.g: masks). This problem was also very pronounced in a program I know well and whose philosophy is quite similar: AVID DS.
Every day I like Adobe Premiere more and more and I don’t understand the snobbery of people who discard it. Whoever wants to use this tool thinking about CColor should rethink it because the cost of the license will have to add the Avid Artist controller.
If you are interested in a more detailed explanation of the terms we talk about here (Raw, reconformed, luts, etc) you have at your disposal our course on codecs, formats and workflows.
Post-Data_
The fact that when loading and saving color presets, they dedicate a whole button to “read from CDROM” and another one to “eject CDROM” makes me think that nobody has rethought the interface since the 90’s (how did they miss this in the “repolishing” they have given to the program !!!!!).