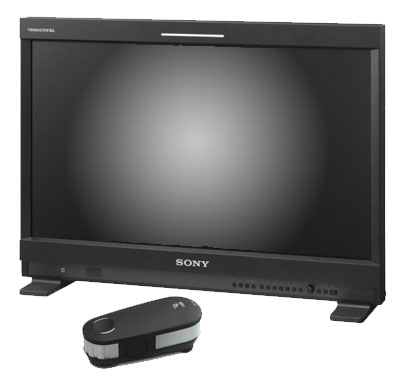
From AbelCine comes this tutorial on monitor calibration, and more specifically on white point adjustment using an X-Rite probe and Sony monitors.
As English is not a strong point for many of you, here is the step-by-step tutorial:
The term “Auto White Balance” usually reminds us of that little “AWB” button on many camera systems. When you press it, the camera tries to adjust the RGB gain levels to make white things really white in the image. However, this is not the only place where white values are important. A properly calibrated monitor is essential to make sure that what you are seeing on set is what you will “really” get in post production.
Many of you have probably heard of the basic method for monitor calibration, using SMPTE bars, which does not cover the most important aspect of the monitor: the white point. The vast majority of monitors and TVs today conform to the Rec. 709 standard (ITU-R BT.709), which specifies the white point at D65 or 6500 Kelvin. In the image below you can see a chromatic diagram showing the Rec. 709 gamut (inside the black triangle) and, located in the center, the D65 white point.
An important issue to keep in mind is the coordinates of D65 (x=0.3127 ; y=0.3290). If the monitor does not produce the target at or near these numbers, then we have a problem.
If you have a Sony monitor there is a simple and relatively affordable solution for calibration. Sony’s “Automatic White Balance Software” works with a wide variety of probes and works with most LMD, PVM and BVM monitors (only the entry level is excluded on the LMD 1510W, LMD 1530W and LMD 2110W models). This means it can be used with the new OLED monitors as well as a wide variety of LCDs.
To determine an exact target spot, a monitor probe is necessary. The software works with some very good (and expensive) probes, among others the X-Rite i1Pro 2 model (priced around $1000). To use the Sony software with the X-Rite you will need to do the following:
- Install the software. I have to tell you that it only works on Windows so those of you who have Mac will have to configure the dualboot (Boot Camp).
- Connect the probe through a USB port. You will need to install some basic drivers that are included with it.
- Start the Sony software and choose X-Rite from the drop-down box. To calibrate it you will have to place it on a black surface and click on the “Calibrate” button.
- The monitor is connected via an Ethernet cable. This can be done with an existing network, but it is recommended to connect it directly to the computer.
- Now you have to set a local IP address to the computer’s network so that it and the monitor can understand each other. To do this open the Network Settings and set the IP to 192.168.0.200 and “Subnet Mask” to 255.255.255.0. This IP is in the same range as the monitor, so you can easily connect. If you are not sure how to set the IP address you can have a look at this tutorial, intended for Windows 7 users.
- Next is to enable remote control of the monitor by setting the “Serial Remote” mode to Ethernet and, since we are connecting directly, set the connection mode to “Peer to Peer”. These settings could be in different menus depending on the monitor; in this case it is the PVM-2451.
- We go back to the Sony software, click on “Network Adapter” and look for the adapter with IP specified above.
- The Connection Type is chosen by selecting “Peer to Peer”, and the software will start searching for the monitor. If all goes well, it should connect immediately.
- The monitor should appear in the “Target” area. In this area of the screen we also see “x” and “y” values that by default are in the Rec. 709 specifications, just as mentioned above.
- Before calibrating it is necessary to pass an HD-SDI signal to your monitor (any valid signal from a camera, recorder or generator will do). This is required on most Sony monitors for the process to work, but not on BVM monitors.
- The color temperature (Color Temp) is set to User. This will allow the probe to adjust the color as needed. The default User should be a copy of the D65. This is what this setting looks like on the PVM-2451.
- The probe is placed in the center of the monitor screen. The X-Rite comes with hardware that allows it to be easily hung on the front of the monitor.
- To start the calibration process click on the “Adjust” button in the “Luminance” area. The luminance (Y) defaults to 100; this can be adjusted based on your viewing environment.
- The monitor will begin to display patterns on the screen, used to adjust the white point of the monitor at various luminance levels. After a few minutes the calibration will be completed and the white point will be as tight as possible.
That’s it! Now the values are very close to those in “Target”. This will bring the monitor into specification for most applications.
When combining different monitor types you can choose D65 from the “Set To” drop down option under “Set To”. This will produce “x” and “y” values with different offsets based on the monitor type. LCDs and OLEDs tend to look different, even when matching their white point values, so this offset will help you adjust for that.
And if you want to learn more about calibration, color management and practice with different monitors, elements and programs, I recommend the course organized on July 6. Here you have all the information about it.


