Apr
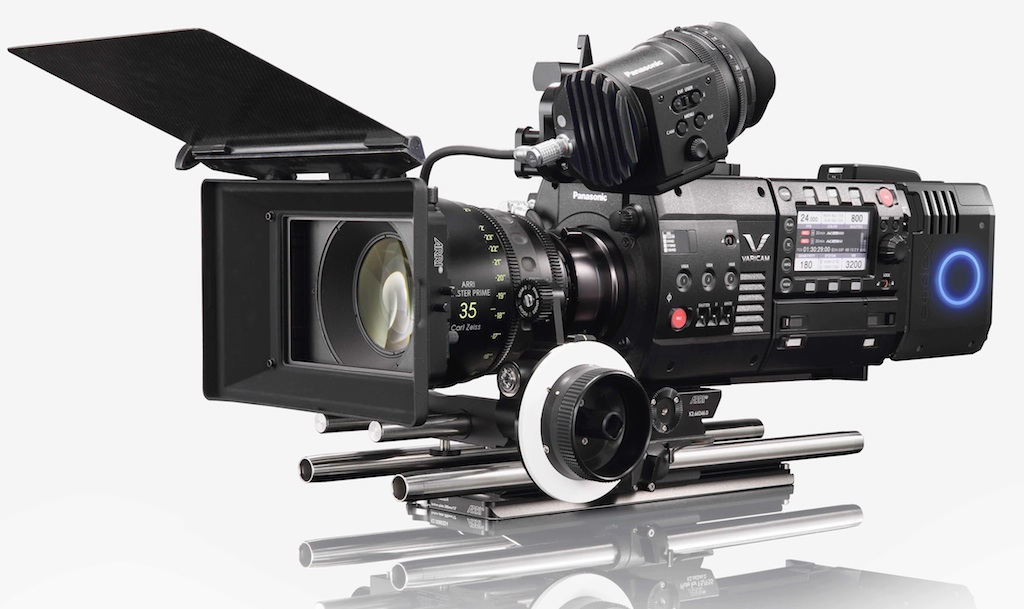
We hope you have rested and recharged your batteries during the vacations. We invite you to read this small personal review of one of the new digital cinema cameras: the Panasonic Varicam 35.
We have been lucky enough to test the new Panasonic Varicam 35 camera and to collaborate in one of its first presentations at EPC, in Madrid, to whom we want to thank for the good treatment and collaboration they always offer us. Given the interest that this new camera is arousing, and although we had little time to test the camera, and we have not performed all the technical tests on it, we made this article where we review its most significant features.
It comes to the market within the high-end camera segment, a long-awaited camera, as we were missing Panasonic’s high-end product.
The new Varicam comes to the market offering the most interesting features of its predecessor, such as the color of skin tones, combined with interesting new functions such as the double sensitivity of the sensor.
The first impression is that of a very robust and resistant camera. It has been chosen to develop a camera with hard materials and that allows us to work with the tranquility of feeling in our hands a really robust and reliable product. This feature is very interesting, both for hard and demanding shootings, as well as when equipping the camera with other accessories, having the peace of mind of knowing that the camera can handle them without problems. And in this sense the handle of the camera stands out, very robust and equipped with standard threads that allow us to put magic arms and other accessories.

Like other manufacturers, Panasonic has opted for a modular design that divides the equipment into camera head, where we can opt for the Varicam HS (High Speed), the Varicam HS (High Speed), the Varicam HS (High Speed), and the Varicam HS (High Speed). or Varicam 35 (film style model). It is the latter model that we have had the opportunity to test, and the one I consider the most interesting. In the table below we can see the main features of each camera. The most significant is that the HS works with 3 2/3″ MOS sensors at 1080, while the 35 works with a single 35mm MOS sensor and at 4K. As we can see these are important differences.

Following the path of light, the Varicam 35 features an integrated PL mount in camera. It does not use any type of adapter to be able to work with PL lenses, so there is no conversion factor when using standard PL lenses.
Care has been taken in the choice of mount materials to avoid possible collimation mismatches due to the dilation factor. It also has internal collimation adjustment, according to Panasonic for emergency adjustments, since in principle we should not have any problems during shooting.

The mount also incorporates an OLPF, a low-pass filter with ultraviolet and infrared clipping, which is essential in today’s sensitivities.
We have internal neutral filters in the camera, which ensure coverage of any focal length of the lens, and a filter wheel, which allows us to quickly access and change filters, with absorption factors of 0.6, 1.2 and 1.8 ND. In the tests we have not noticed any problem of infrared contamination in the blacks, but I am of the opinion that nowadays we should always carry an IRCUT in the filter bag, as there are some fabrics that reflect IR and with very high neutral densities they can sneak in. Although I insist that we have not observed this characteristic in our tests.
Uses a new Super 35mm CMOS sensor, rolling shutter with a resolution of 4K with 8.9 million effective pixels. This new sensor and its design incorporate one of the features that has generated the most interest, the camera’s Dual Native Sensitivity, one at 800 ISO and the other at 5000 ISO, and most surprisingly, with almost the same noise level.
As we can see in the graph, we start from the initial gain of 800 ISO. As we increase the sensitivity, the noise increases until we reach the 5000 ISO step, where we can clearly see how the noise level decreases considerably. These are two “starting points or two different levels when setting the base sensitivity of the sensor,” said Jaume Miro of Panasonic.

It must be said that the images generated by the camera, starting at 800 ISO have some noise, “organic” style, which seeks to give a texture, a more cinematic image, very much in line with other high-end cameras. But it is surprising how low the noise level is at 5000 ISO. In the graph we can see how the noise increases with sensitivity and how it is drastically reduced at 5000 ISO, but keep in mind that it is a little higher than at 800 ISO, it is the equivalent of 1000-1250 ISO.
Here you can download original camera clips testing ISO Dual
This function has interested me a lot, on the one hand for the obvious advantage of being able to work with 5000 ISO as a base, but I also think it is interesting for other situations, for example in those situations where the depth of field is very reduced due to lack of light, by increasing the gain and compensating the diaphragm.
I would also like to comment, especially for the production department, that working with such a high sensitivity does not always mean that we work with less lighting. When we want to create a large field of light, we must resort to powerful light sources with a large light beam to meet our needs. So it is not a panacea, but it is very interesting, so much so, that it may be the reason to use this camera in our next project.
And especially if we are looking for a more aggressive type of photography or as we commonly define it, a “dirty” photography, which I personally am very interested in. The images generated by the Varicam work very well with Bleach Bypass type effects.
The use of black balance and/or black shading seems to me fundamental when it comes to controlling the noise level of the sensor and the correct capture of colors in low light. In fact I am surprised by the cameras that do not give us this option, although I am also surprised by the excessive time required by some cameras to make this adjustment. In high speed it is indispensable every time we change any camera setting. The first information I had is that the camera does a black balance every time it is turned on/off. Nothing further from the truth, the camera has an ABB setting, but we are not going to find it as a menu item, but we must assign this setting to a user button, allowing us to make this adjustment whenever we need it, and without showing an excessive time. However, beware of accidentally touching this button, as this adjustment is made without the lens cap by mistake with disastrous results, and you have to make the adjustment again correctly… so that the same thing does not happen to you…
The gamma curve chosen by Panasonic is the VLog, a curve that mimics the response of the famous cineon. The result is a very logarithmic gamma curve very similar to LogC, as both mimic the cineon response. The image is typically logarithmic, desaturated, with lifted blacks and compressed whites, allowing us to have a contrast ratio of 14 FStops (according to the manufacturer “more than 14 Fstops”).

Undoubtedly this type of gamma curve is by far the most used in any film project, and will be the most used in our projects, so we can have LUT’s in the color correction programs we use today.
It is essential to increase the color space before the arrival of Ultra High Definition, and the Varicam exceeds the color space of REC BT. 2020, the standard that regulates the technical parameters of UHD broadcasting. And the color space is increased, while maintaining Panasonic’s typical skin tones, which were already very well received with the first Varicam. The native color space of the camera is called V-Gamut and we can see a comparative graph that allows us to see the extent of the V-Gamut.

We must remember that nowadays we work within the color space offered by the cameras, and there is little we can do to improve it, we depend on the camera, so the choice of the camera that has a good color space is essential.
Here are two clips recorded on location to see for yourself the dynamic range of the camera: Clip 01 and Clip 02.
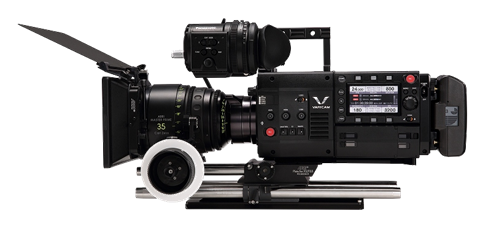
On the other hand, we have the recorder module the AU-VREC1G being common for both camera heads. The connection system between the camera and the recorder is made with a V-Lock mount and internal wireless connection that ensures the correct transmission of data and the intercommunication of the equipment. When the two bodies are joined together, they form a single module, which can be used as a standard for filming.

But it adds the possibility in the future to work separately from the camera module by cable, reducing considerably the size and weight of the camera, interesting for Steadycam, underwater housings, Cineflex type systems for helicopters or in situations where we need a smaller and lighter camera.

The VREC recorder currently supports up to 4K in AVC Ultra 4:4:4:4 at 10 bits, including other resolutions and lower codecs as we will see later. If we want to work with the highest quality in RAW, we must implement one more module in the camera, a recorder manufactured by Codex, which will appear soon and that we have not yet had the chance to test. What we do know in advance, is that it has been decided to use the same type of Raw capture as in the Alexa, where first the logarithmic gamma curve will be applied, to reduce the data flow that working directly on the native reading of the sensor would have. This is a very interesting option to reduce the file size without losing information.

The recorder appears with a design very similar to current high-end cameras and with very similar features, such as the secondary menu screen or assistant, whatever you want to call it, which has shortcuts to the camera functions. This feature is very valuable, since in an intuitive way any experienced operator could configure the camera, even if he had not seen it before.

As we can see at a glance, the camera settings when we took this image capture are at 24fps, 180º, ISO 800, 3.2K. What may not be so familiar is the MAIN and SUB settings and the two recording codecs, what’s going on?
In the recorder we see that we have 5 slots or slots for cards. The MAIN slots are for P2 EXPRESS cards and in them we are going to record in high quality. In the slots that we have marked as SUB, we will use MicroP2 cards, capturing in a lower codec or even in Proxy, and in the SD slot, SD cards, where we can save menu configurations, etc.

Codecs in MAIN recording

In this table you can see more graphically what is the set of codecs that correspond to each type of MAIN resolution (although it does not appear in this table if we record in MAIN in AVC Intra4K 444 we would have the same correspondence of SUB and PROXY as in MAIN AVC Intra4K 422).

This configuration allows us to perform different types of recording. In addition to the functions of intervalometer or speed change up to 120 fps, we can make independent recordings in different qualities in the dual recording function, more than interesting in this camera.
Thus, in the SYSTEM setting we are going to decide in which codec and with which resolution we are going to perform the main recording. As we can see in the table, the maximum recording quality is 4096X20160 AVC INTRA 4K 422 at 10 bits. 3840×2160 is the Ultra High Definition resolution. And underneath different codecs that we will use according to the needs, especially thinking about the dailies.
In the COLOR setting we decide which gamma and color space we are going to use in the different recordings. In our capture, a REC709 is being applied to both the main MAIN recording and the auxiliary SUB recording. The normal in a film project will be to work on the main MAIN recording with the Vlog and to be recording simultaneously on the Micro SD, applying a LUT 709 or 2020, and therefore taking the dailies directly from the camera.
And here we talk about the other great feature of this camera, the ability to perform color corrections via wifi directly on the camera, allowing us to take dailies with custom color correction.
I sincerely believe that this is the future of “Live” color correction, which we are currently performing. Basically it is a “LUT Box” integrated in the camera, which Luis Ochoa discusses in depth below. I’m very interested in being able to work with wifi, without having to access the camera directly… In the film “Mama” by Julio Medem, I made in-camera corrections with this system and it is very interesting to be able to work on the camera settings without having to access it directly and the camera equipment can continue to function normally.

In the case of the Varicam (and actually in all cameras with these possibilities), we connect through a menu on a page with network settings and work with software recognized by the camera. In our case we use Pomfort Livegrade, one of the most widely used programs in our country for live color correction. It must be said that there is a slight delay between the settings on the computer (there is still no version of Livegrade for Tablets but I’m looking forward to it…) and the camera, either by wifi or LAN, i.e. by cable. As of today this “delay” is “normal” but hopefully in the future the response time will be improved. Be sure to check out Luis Ochoa’s comments on this interesting camera feature.
It also allows us to select whether the settings we are going to make are CDL (Color Decision List) or color grading and assign them to the different recordings and also to the different outputs.

Regarding the camera menus, the first thing to reassure you is that I am not going to expand on explaining each menu item. They are actually quite intuitive, and what is important to remember is that although the name of some functions may change, the function itself is the same.

As you can see in the image, the menus are divided into different “chapters” or folders, and inside them you will find all the camera settings ….. All of them? No, be careful. For example the False Color function is only available in the viewfinder menu…..
In the viewfinder, therefore, we find the tools and aids offered by the camera and there are also new features: an OLED with a resolution of 1280×720, camera controls, diopter adjustment and a new function that I liked when we tested it, an optical zoom in the same viewfinder that allows us to increase or decrease the size of the image.

The camera comes with most of the typical tools for exposure and focus control. Waveform Monitor, Vectorscope, False Color, Peaking… are already well known tools, but a new and very interesting and unique focusing aid is incorporated. This is the Focus Assist, a tool that indicates the level of focus we have in the different parts of the image with squares that increase and decrease in size depending on the level of focus.


As for the connection we have different options that allow us to configure different options. Four 3G HDSDI outputs that allow us to get 4K directly from the camera. In addition to two HDSDI Monitor Out outputs that allow us to vary the configurations of each of them and one more extra output on the camera body. For Audio we have two XLR 3 pin inputs with the typical functions Line, Mic, +48v, XLR 4 pin power supply and two 12v auxiliary outputs, one in the recorder and one in the camera.
This “richness” of outputs allows us to make different settings for different outputs without using matrices or selectors, a daily requirement in shooting. And let’s remember that we can get different camera configurations for the different outputs.


CONCLUSIONS
From my point of view, it is a camera with very interesting features that make it have a great potential. Ideal for film productions, TV movies and series and advertising. For the documentary world I see it also very interesting, although it must be taken into account that the robustness of the camera is paid in weight, and depending on the shooting I would take it into account.
The features that I find most appealing about the camera are:
5000ISO native is already attractive enough to consider this camera.
The Vlog as a logarithmic curve that allows us to reach 14 Fstops of contrast ratio.
Possibility of independently configuring different outputs.
Live color correction via wifi.
Generation of dailies simultaneously with the recording.
We hope that soon we will have more models on the market and we will be able to use it in our shoots. Here you have the second part of this article written by Luis Ochoa.
Author: Rafa Roche