News
SGO Mistika course evaluation, introduction and basics
Mar
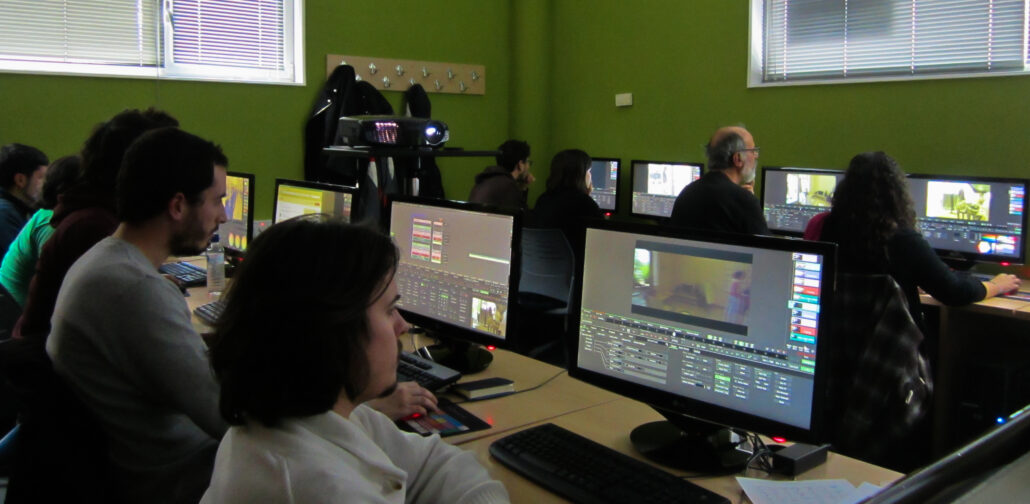
The SGO Mistika course on introduction and basics, organized by 709 Media Room, took place between February 25th and March 1st. It was given by Ricardo Posada, colorist, 3D animator, digital compositor and visual effects supervisor with a 15-year career and senior Mistika operator.
The course was divided into four days of five hours each.
DAY 1
At the beginning Ricardo explained the system requirements and how to install a license. After that we started the course with the mConfig, which appears as a shortcut after the installation and apart from the one that opens the system. It opens all the available options for Mistika configuration, so we started with our first project.
Leaving aside the more advanced configurations, we finally enter Mistika and begin to see its interface, with a somewhat peculiar workspace, several cursors and a work philosophy different from the rest of the usual postproduction programs.
The next thing we had to do was to create the project and import the material, thus seeing Mistika’s way of naming the imported clips and created projects.
During this first class we became familiar with the interface, discovering the functions that appeared on each mouse button, the keyboard shortcuts and the “gestures” that Ricardo taught us. In addition, we were provided with a list with drawings of these gestures so that we could practice.
We also saw the full editing window, with the calculator as a method to obtain and set clip durations, tools for cutting, joining, grouping, working with audio and video together or separately, etc.

Every day of the course Ricardo accompanied his explanations with practical exercises, so the concepts and possibilities are more easily internalized. On this day we did an exercise that consisted of putting a circle of some color inside an image, which helped us to start seeing some effects such as Solid, External Key and Comp3D.
It could be said that this first day was quite intensive, since transitions and wipes, titling, scene detection, primary color corrections and debayer of cameras such as RED or ARRI were also taught.
DAY 2
The second day was dedicated to all the effects and compositing, starting with Timewarp (optical) and Vector Paint. With the latter we learned how to use keyframes, how to manipulate shapes and we were surprised to see the result of the “Repair with Virtual Frame” function, capable of completely eliminating a drop.

The following exercise was developed little by little. First we imported a clip containing a chroma key, adjusted its resolution to that of the project and applied the corresponding effect, where we were taught to modify the parameters that allowed us to adjust the key. Little by little the practice became more complicated, when Ricardo asked us to create a mask to keep only a part of the image, so we learned to use the “Shapes” and the “Tracking” tool.

We also start to see the Output window, with the most basic functions: like exporting video, audio or frame sequences, naming them and rendering modes in “background” or “foreground”.
Since the interface has multiple buttons and explaining them all at once is not usually the most convenient, Ricardo was mentioning new functions as the classes went on. On this second day we saw some of them such as AutoSnap, playback, edit or user marks.
DAY 3
On the third day it was the turn of color correction and stereoscopy. David Rivero, visual compositor, colorist and stereographer expert in Mistika, came to give this class.
We started with color correction and, following an order of complexity (from lower to higher), we saw how to use the tools “Primary”, “Bands”, “Ranges”, “Fixed” and finally “Select”. This last one, dedicated to secondary corrections, was the one we spent the most time on. Step by step David explained each of the available functions that would allow us to select an area and then affect it or the rest of the image.

Mistika works with layers, which in the color correction module are “Vectors”. From the tool you are using you select the vector you want to affect, which can be the original source, a previous vector or a matte, for example.
We also saw the StoryBoard and how to jump from one shot to another without having to leave the corrector, how to save corrections to apply them to other clips, compare images and create groups.
Before starting with the stereoscopy tools, David gave an introduction to explain the basic concepts; from recording to the common problems that arise, including terms such as “parallax” or “depth budget”.

Once we had this clear we went back to Mistika to apply the “Stereo 3D FX” on the clips corresponding to the right and left eye. Entering the effect options we could see the display modes, with descriptions of each one of them.
Then we move on to color and geometry adjustments, with automatic tools and parameters to set the convergence point, correct errors, affect one or both eyes, and advanced adjustments.
Keep in mind that not everything about s3D can be explained in one class, but we still learned how to identify some of the most common problems and how to fix them.
DAY 4
The fourth and last day started with RED’s HDRx, for which we used the corresponding decoder and the HDR effect that allows us to make a mix of the two images with different exposures.
Ricardo explained how to make color changes and fix artifact problems with “Optical Motion Blur”.
We continued with some effects that we had left over, such as “Denoise”, for noise elimination and with clarifications on the advantages of some modes or others; or “Frame Repair”. In addition, David (who took part of this last class) gave us some tips for working with effects like these, which usually spoil the first and/or last frame.
And one of the most important issues in post-production systems was missing: conforming. We were shown how to work with EDL or AAF step by step, importing the files and linking them, as well as the options available for searching the clips.
We also finished seeing some more advanced options of the “Output” window, such as rendering each clip independently or exporting EDLs.
Then we went back to the “mConfig” to examine all its tabs and the options it offers. And to finish the course we demonstrated a complete workflow, from initial setup to rendering, applying effects and color correction and briefly explaining the creation of DCPs.

In addition to getting an introduction to Mistika and practicing with its compositing, stereoscopy and color correction modules, this course includes the official SGO “Mistika User” certification and a one-year Mistika Insight license (which runs on Windows).
If you are interested in future calls for this course, you can consult this link for all the information available.